MPVEX Real Time Presence
MPVEX Real Time Presence
Real time presence on the user dashboard is like taking the Busy Lamp Fields (BLFs) off the phone and putting them into the user’s dashboard! This was added for those users who spend most of their time looking at their PC screen and don’t really need to have a large phone on their desk to see who’s on the phone. Adding this feature is relatively easy, but each user must have access to their Dashboard. So, if this looks like something you could use, reach out to your Metropark rep or support team.
Once Real Time Presence is added to your account by Metropark and you have your browser-based MPVEX Dashboard pulled up, let’s go through setting up your Presence Groups.
How to View and Create Presence Groups On the Dashboard
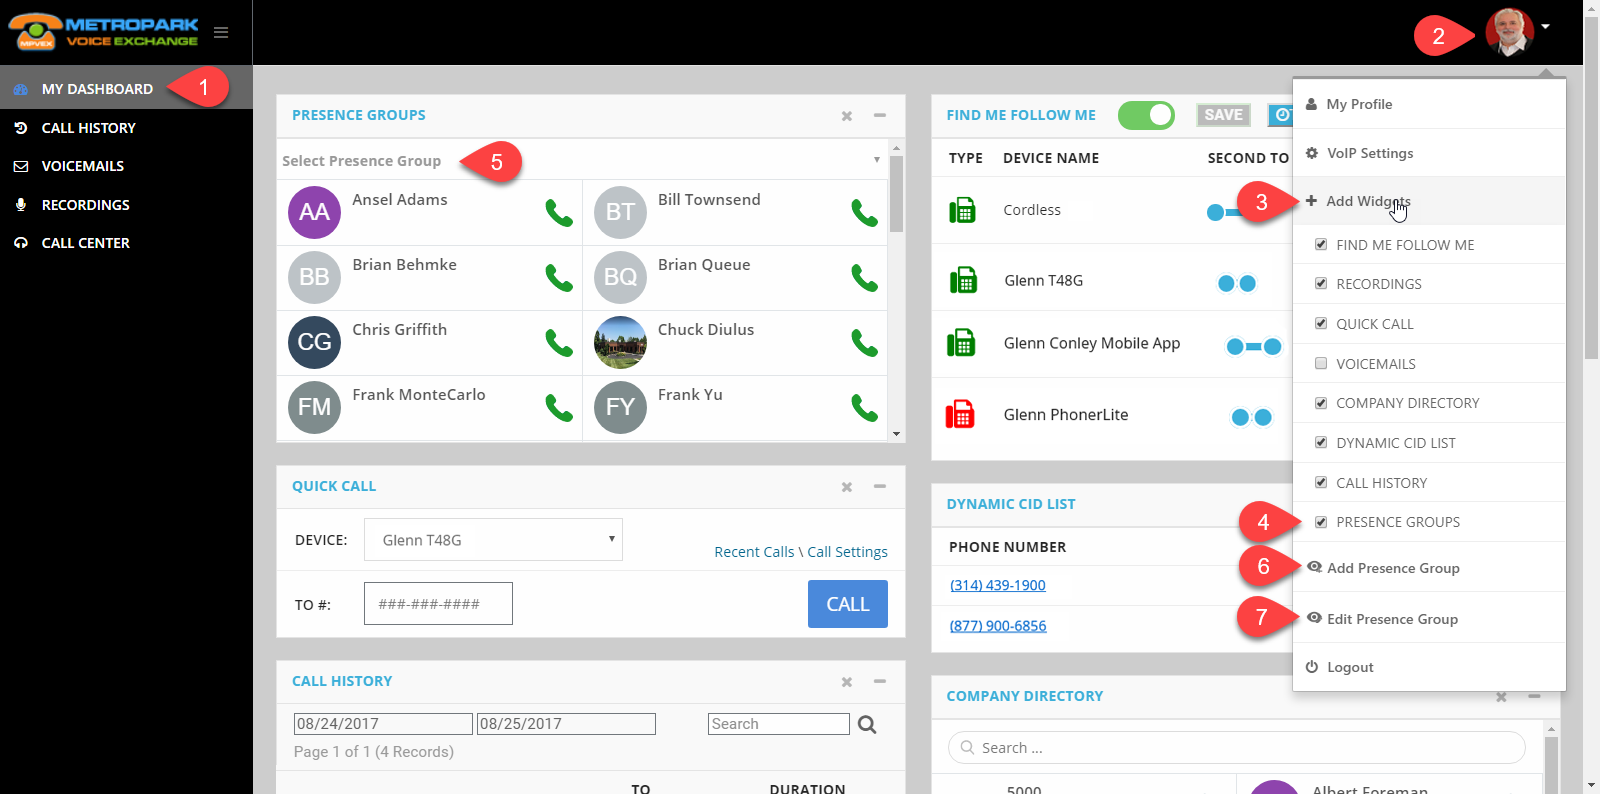
(click image to see it larger)
- Once logged into your dashboard, click on the My Dashboard link
- Click on your user avatar to show the drop down menu
- Click on the “+ Add Widgets” menu option to reveal the list of available widgets for your user
- Enable Presence Groups
- Once the Presence Groups widget is visible on your dashboard, it will, by default, display all users in your account. If you have mobile presence on the Nimbus App, you will already have your presence groups available in the drop down list here. Clicking the drop down will allow you to switch between the displayed presence groups. If you don’t have any presence groups, let’s make one!
- Click on the Add Presence Group menu option to navigate you to the next page
- The Edit Presence Group page works similarly
How to Add Your Presence Groups
(click image to see it larger)

- Enter a name for your group – perhaps “Sales”, “Admin”, or “Best Co-workers”
- On the left-hand side you’ll see all the users in your account listed by name alphabetically. You can use the “+” icon to add a user to your group, or you can click and drag the user from the left to the right and arrange them in any order you prefer. The avatars next to the user will be the first letter of the first and last name of the user by default, or, if they have uploaded their own avatar, it will be displayed
- To add parking slots to monitor, click on the parking icon in the top right corner
- Enter the parking slot you wish to monitor
- Click Add, or hit the enter key. You can add as many parking slots to monitor as you like!
- Save the group
After you’ve saved the group, the portal will redirect you back to the dashboard now showing you the presence group you have created. You may think about using a secondary browser to always have up on your desktop, so you don’t accidently close it down. You can also resize that browser window to take up less space on your desktop too.

- A green phone icon indicates the user is idle
- A yellow phone icon indicates the user is ringing, or they are in the process of making an outbound call, and their outbound call is currently ringing
- A red phone icon indicates the user is on a call
- A blank parking slot indicates the parking slot is available
- A parking slot with a ‘user’ icon displayed indicates there is a call parked in that slot
If MPVEX Real Time Presence interests you, give your account rep a call or contact your support team